My son has a serious obsession with Blippi. And when I say obsessed, I mean I’m #2 on the list of who he calls for when he wakes up in the morning.
I have to admit, I’m a huge Blippi fan too. When all else fails, putting on a Blippi video always calms my son down.
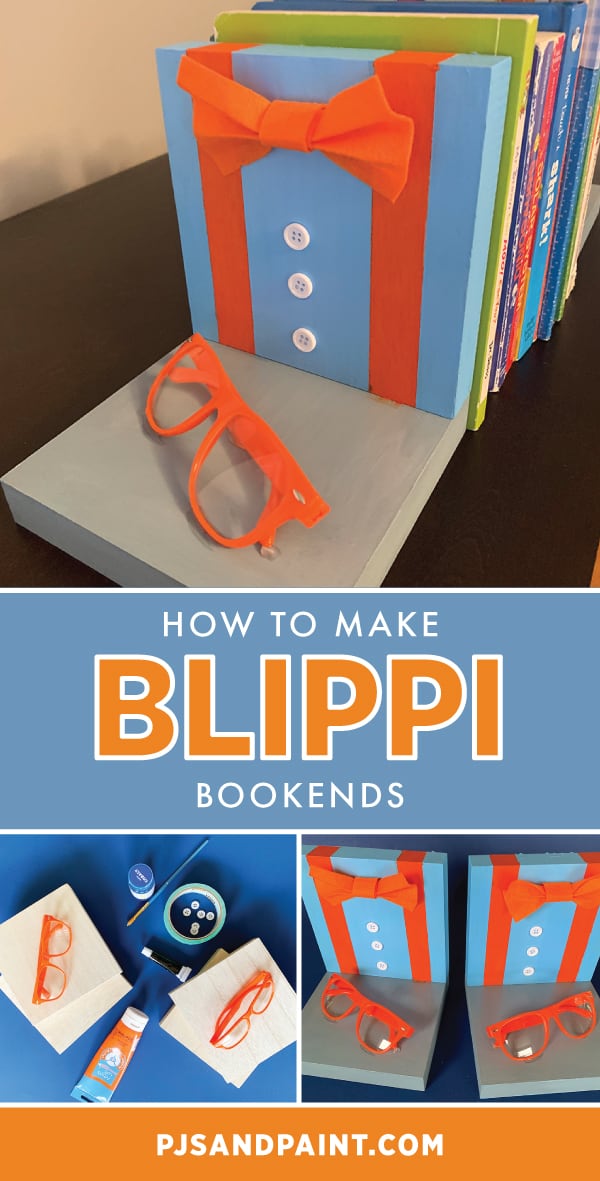
I’ve been trying to come up with a cute DIY bookend project for his bedroom. Right now we keep his books in a stack on top of his dresser so I wanted to come up with something to clean up that area a bit.
That’s when I decided creating DIY Blippi bookends would be the perfect addition to my sons room. Here is how I made them!

Disclaimer: This post contains Amazon affiliate links. This means that at no extra cost to you, I may earn a small commission if you decide to make a purchase.
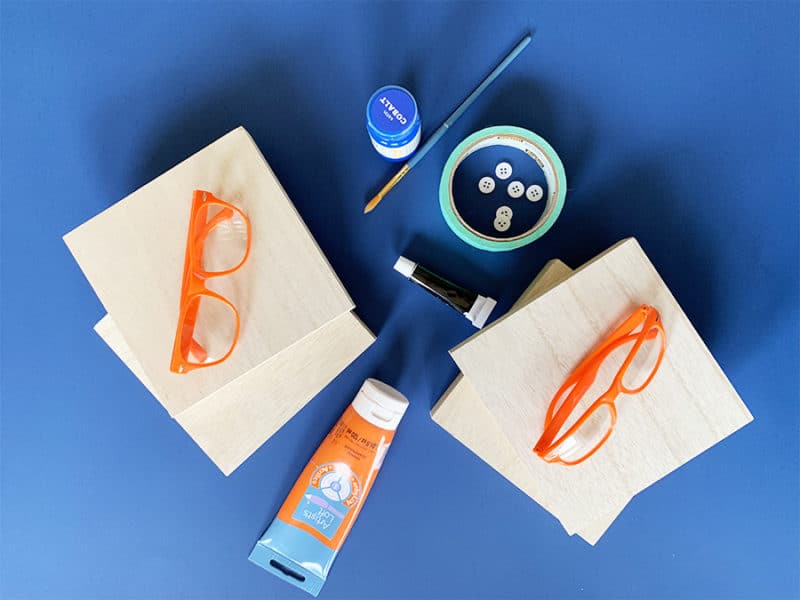
Supplies needed to make a pair of DIY Blippi bookends:
- Wood blocks (I used these 6 inch wood blocks)
- Hot glue
- Orange,Blue, White and Black paint
- Paintbrushes
- Masking Tape
- Orange and Blue felt
- White buttons
- Acrylic varnish
- 2 pairs of orange glasses

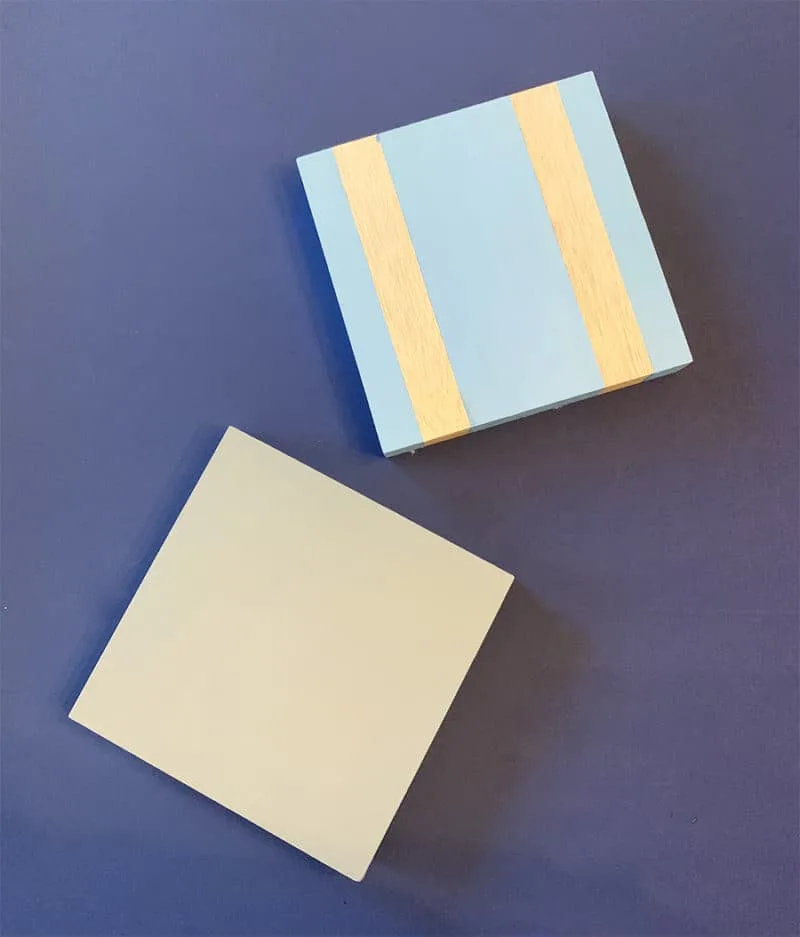
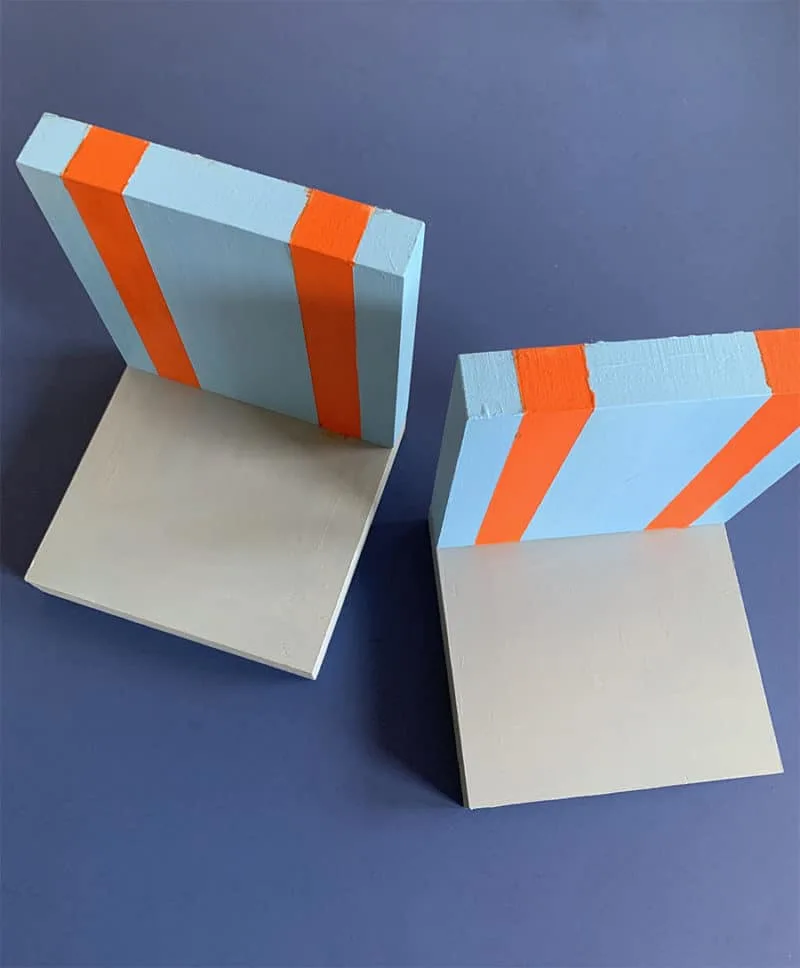
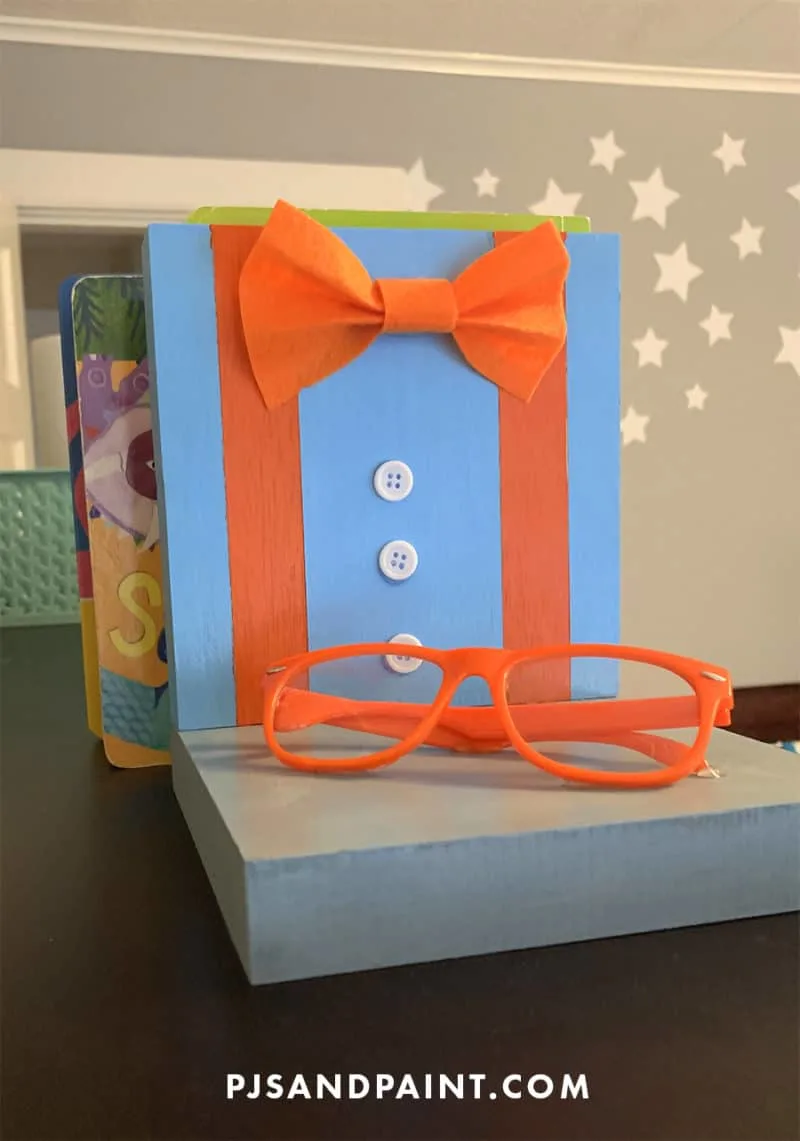
The first step is to take masking tape (approximately 1 inch wide) and place strips on the wood blocks to mark where the suspenders will go. Make sure to wrap it over the sides of the block too so that the suspenders go over the shoulders.
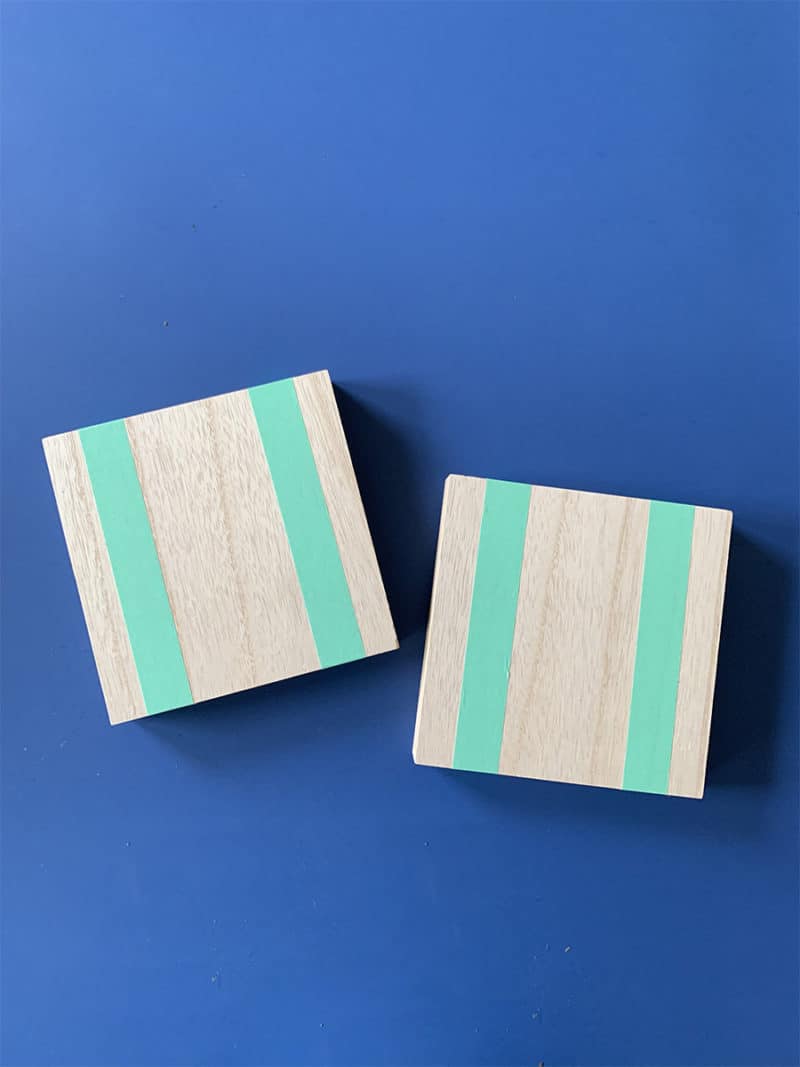
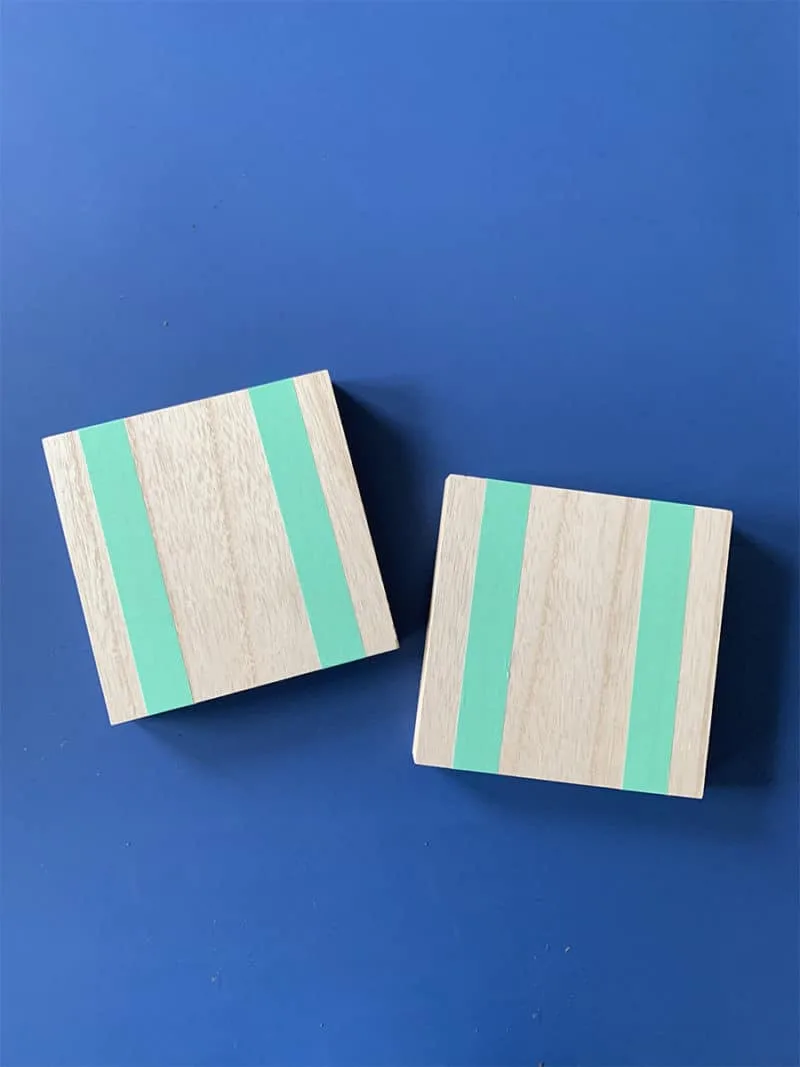
Next, paint the entire wood block light blue. Depending on how thin your paint is, you may need a few layers.
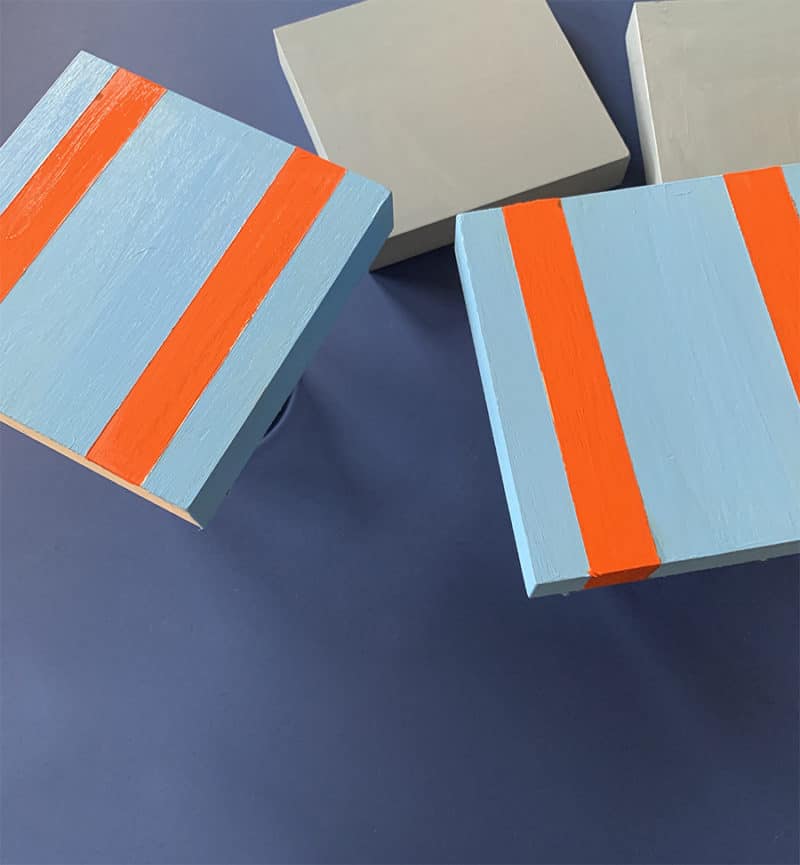
Take the remaining two blank wood blocks and paint them solid gray. These blocks will create Blippi’s pants.
Finally, remove the masking tape from the shirt panels.

Using masking tape again, line the edges of the suspenders. This will ensure the lines stay nice and straight.
Once the masking tape is in place, paint the suspenders orange. Again, you may need a few coats depending on the thickness of your paint.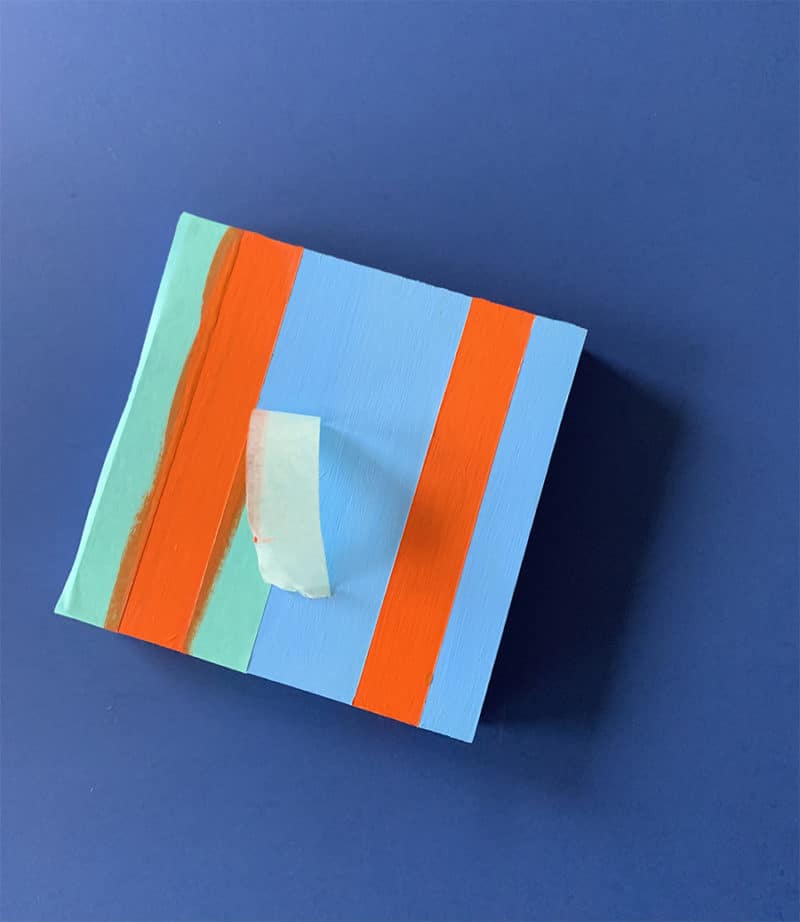

After everything is dry, remove the tape and Blippi’s shirt should be forming right before your eyes!

Using hot glue (or gorilla glue will work as well), place the shirt panels on top of the gray pants panels to form a 90 degree angle.
Next, I took the bookends outside and sprayed with a clear acrylic varnish. I used Mod Podge Podge 1470 Clear Acrylic Sealer. This just helps to seal in the paint and gives a very subtle shine to the final piece.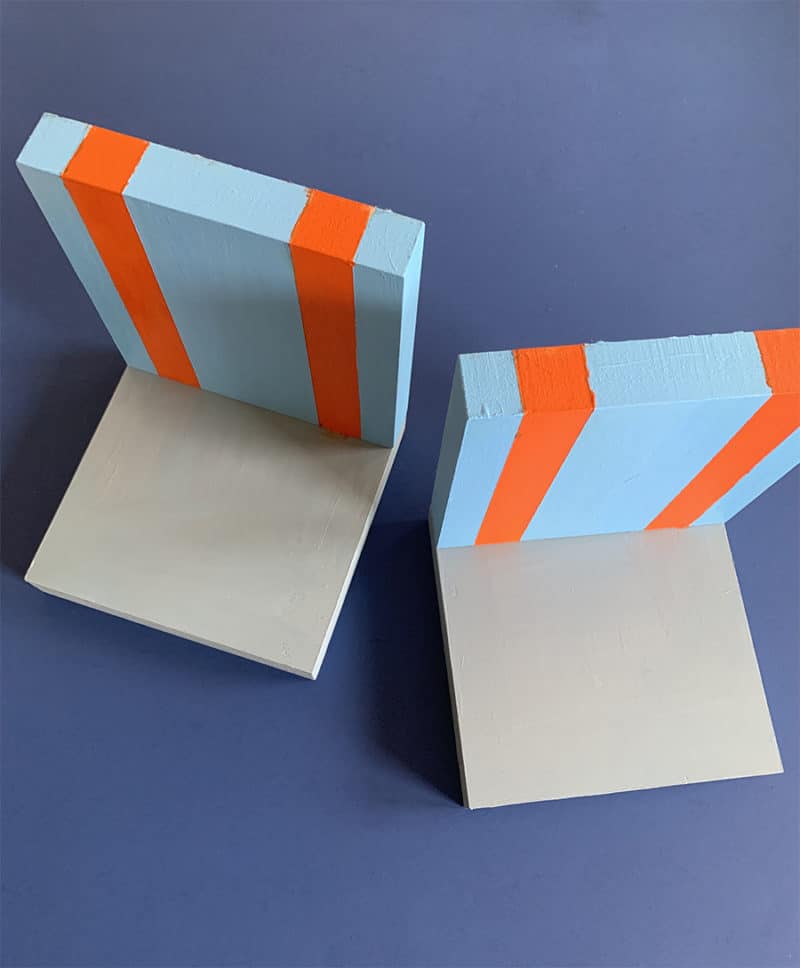
This next step is optional, but I think it makes the end product look a bit more finished.
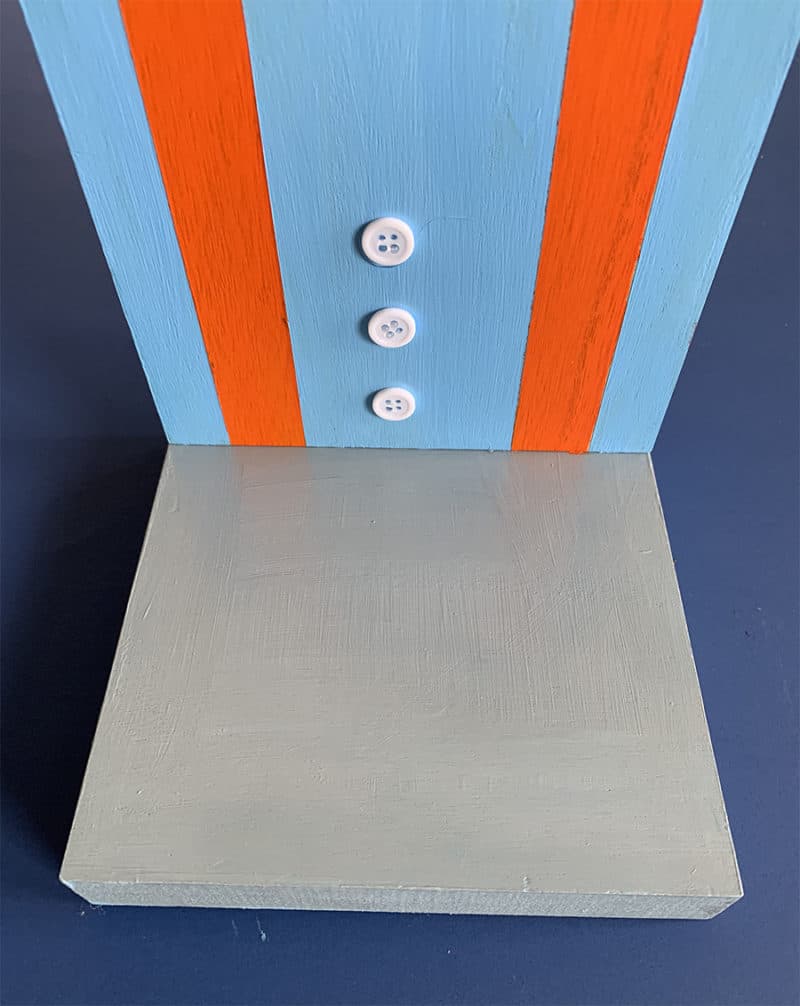
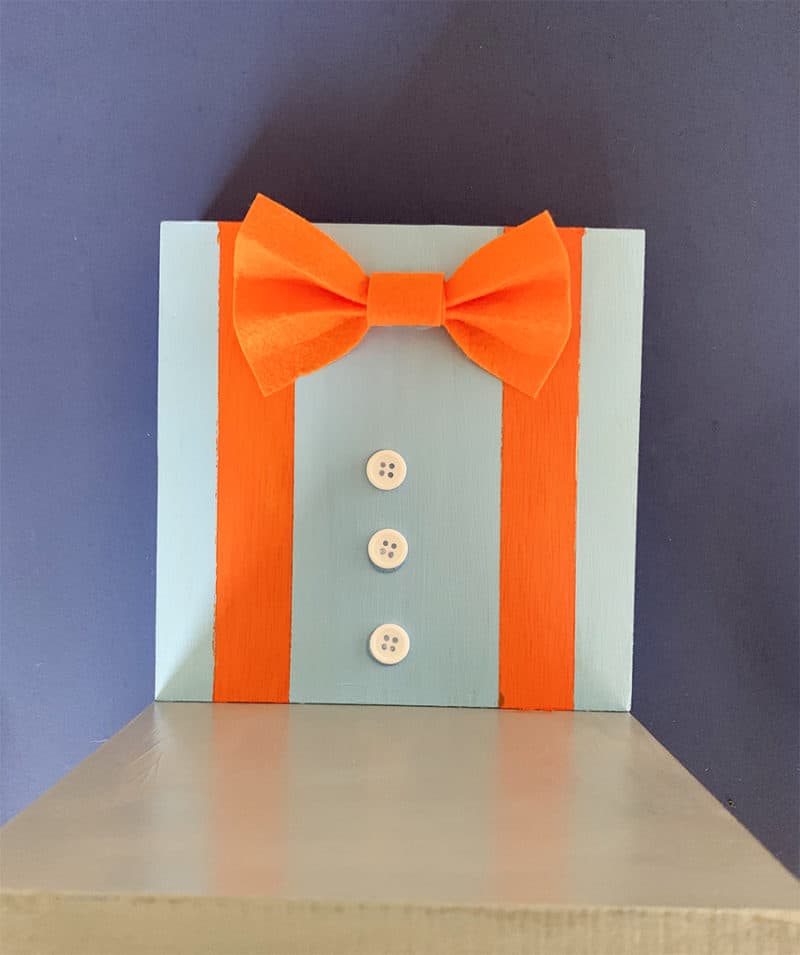
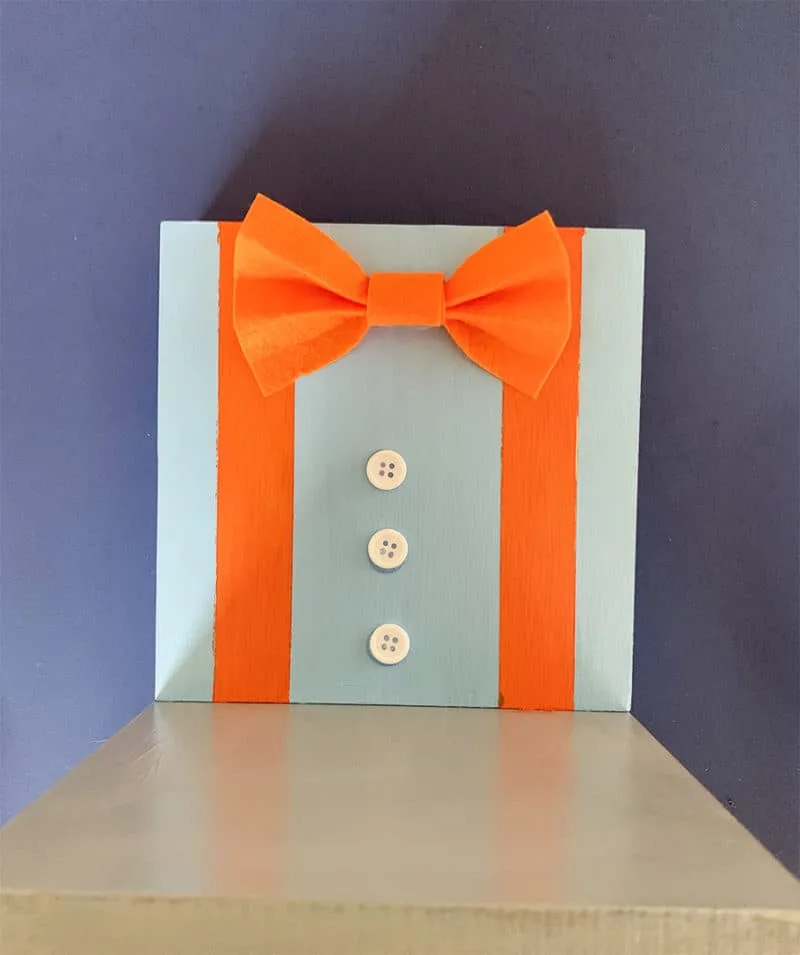
Cut out two 7×6 inch pieces of blue or orange felt and glue them to the back of Blippi’s shirt. The felt should cover the original 6x6inch block and also extend down approximately 1 inch to cover the edge of the pants panel.

Now you can add three white buttons to his shirt. Make sure to leave a bit of space up at the top where his bow tie will go.

Click here to view the no sew felt bow tutorial.
Check out this post for the super easy tutorial on how to create Blippi’s felt bow. No sewing needed!
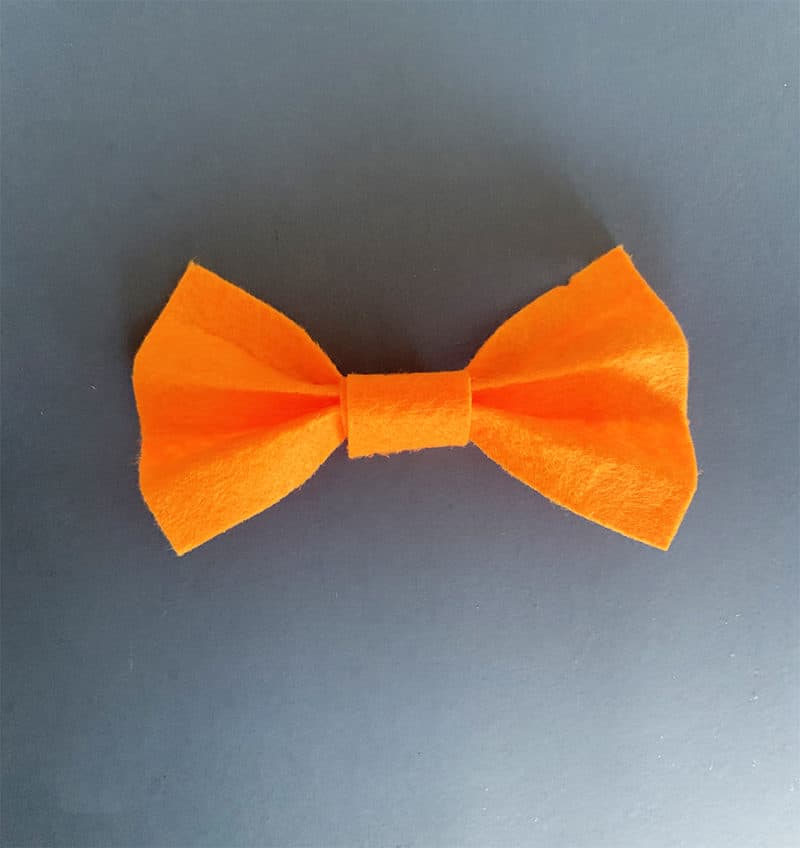
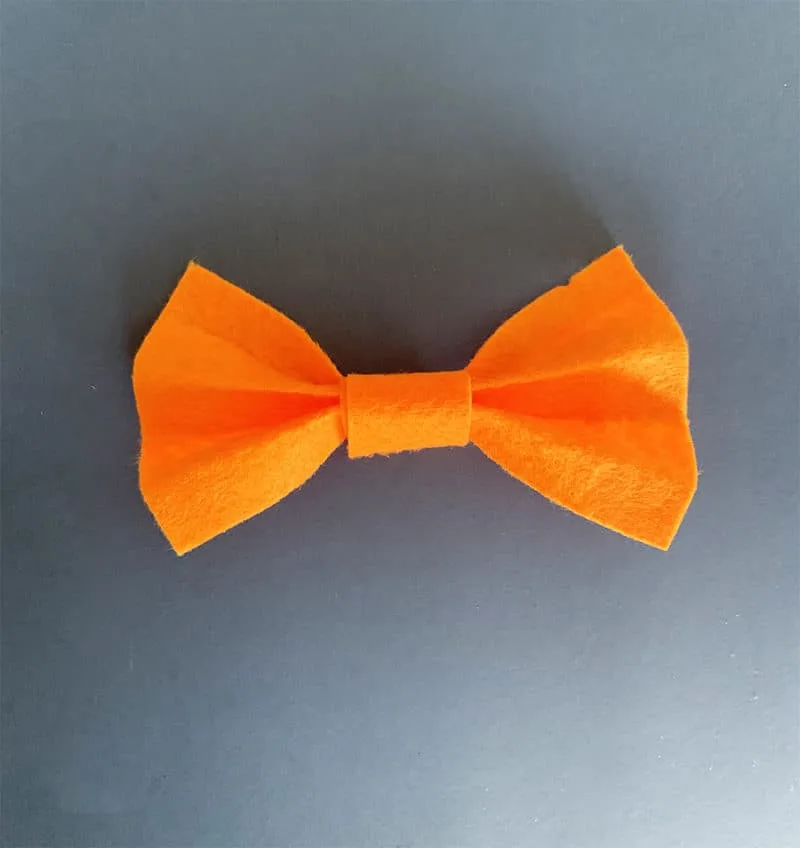
Click here to view the no sew felt bow tutorial.
Once you’ve created two orange bows, glue them to the shirt panel and let dry.
The final step is to glue down a pair of plastic orange glasses to the bookends.

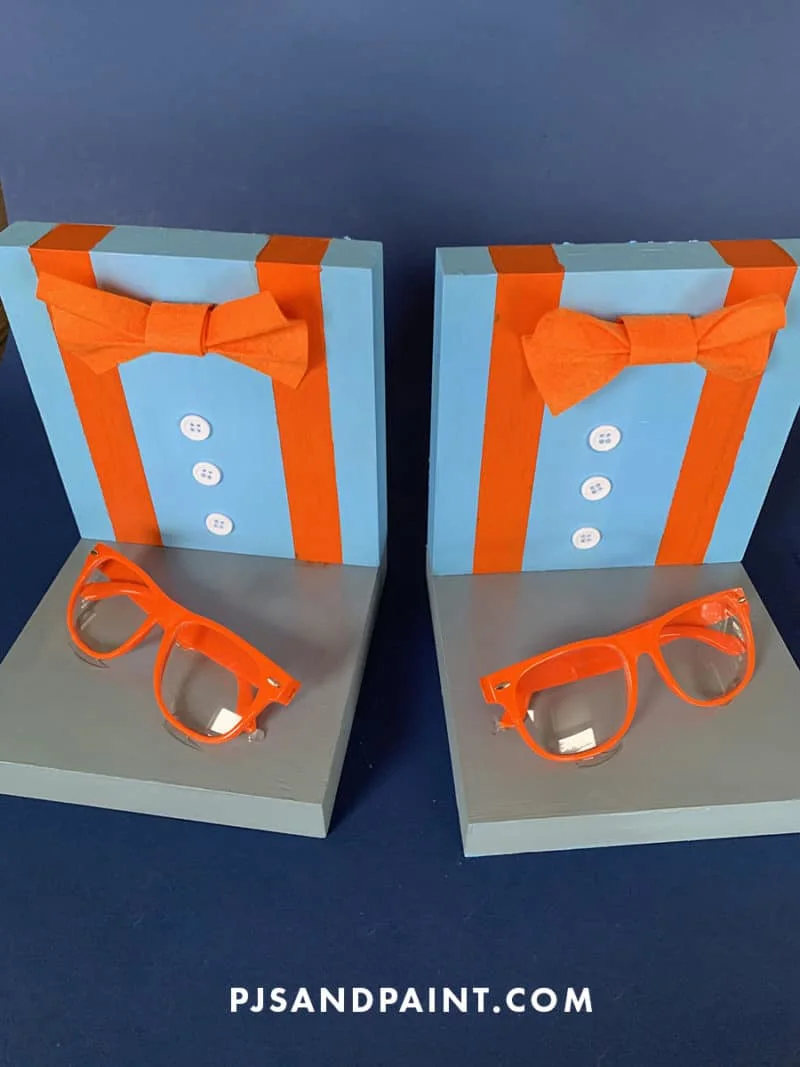
And this will complete your DIY Blippi bookends! I hope your child loves them as much as mine does!

What do you need now that you’ve made Blippi bookends? Blippi books of course! Check these out!


Krista M
Sunday 10th of November 2019
These really are so easy to make & would be an awesome homemade, unique kids Christmas gift!
Elizabeth Matthiesen
Wednesday 30th of October 2019
These are really cute and I love the addition of the glasses to complete the look, great idea :-)