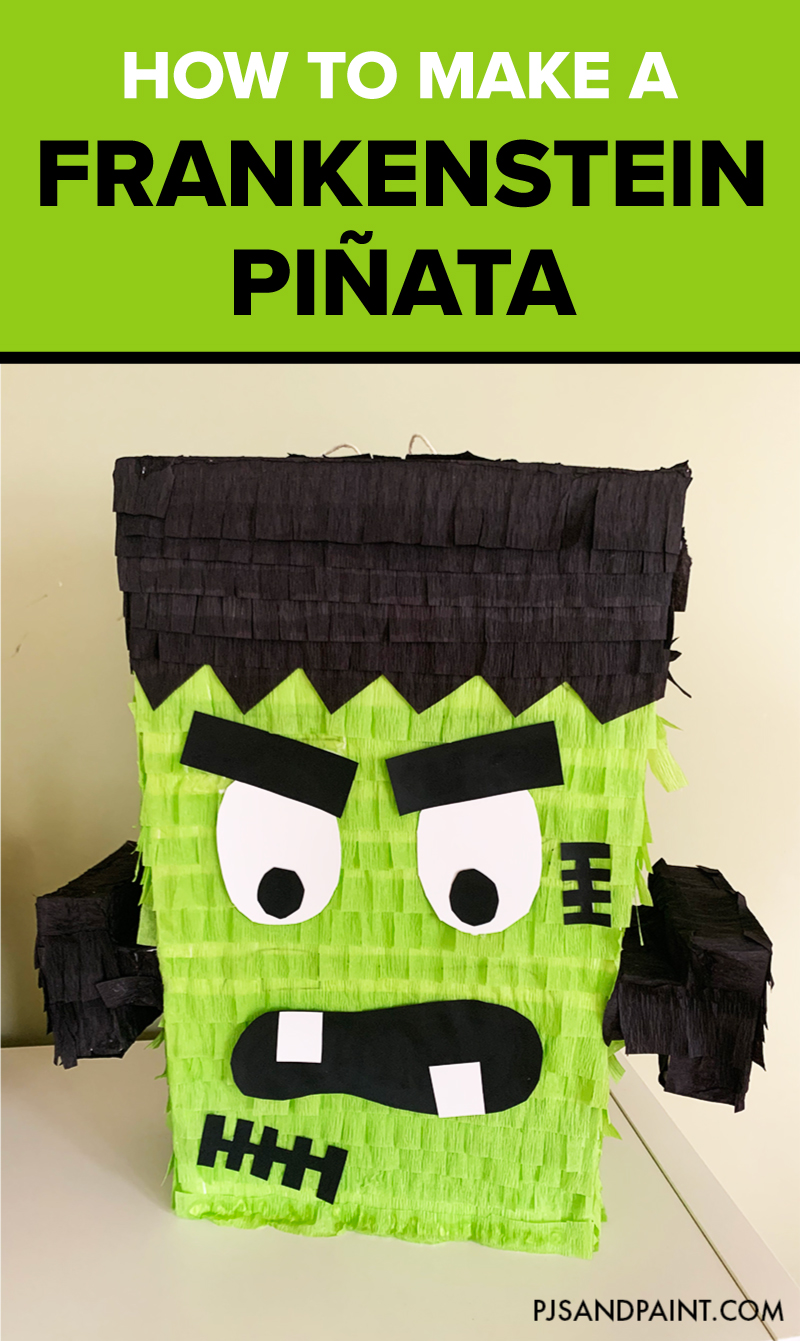
How to Make a Piñata - DIY Frankenstein Piñata Tutorial
Learn how to make this fun Frankenstein piñata, perfect for Halloween.
I think that Halloween is a great time to break out the piñata! It is a super fun way for your kids to have some extra special Halloween treats. Whether you want to fill the piñata up with candy, or non editable goodies, they will surely have a blast taking turns trying to break open Frankenstein.
While this tutorial is designed to help you create a Frankenstein piñata, feel free to use any shape, character or design you would like. Be creative!
This post contains affiliate links. This means that at no extra cost to you, I may earn a small commission if you decide to make a purchase. For more information feel free to read our affiliate disclosure.
Materials Needed to Create a Frankenstein Piñata:
- Cardboard (You can use old shipping boxes, cereal boxes, or cardboard from the craft store)
- Scissors
- Xacto knife
- Masking tape
- Streamers or Tissue Paper (Black and Green)
- Construction paper
- Glue
- String
- Pen or Marker
- Ruler
- Candy or other treats to fill the piñata with
The first thing you need to do is prepare your cardboard. You can flatten out an old shipping box, cereal box or use store-bought flat cardboard.
If you are using shipping or cereal boxes you may need to tape a few together to get the desired size. Don't worry about what the cardboard looks like as you will be covering it completely with tape and streamers/tissue paper.
For my Frankenstein sample, I used some thick posterboard that I had gotten from the craft store a while back.
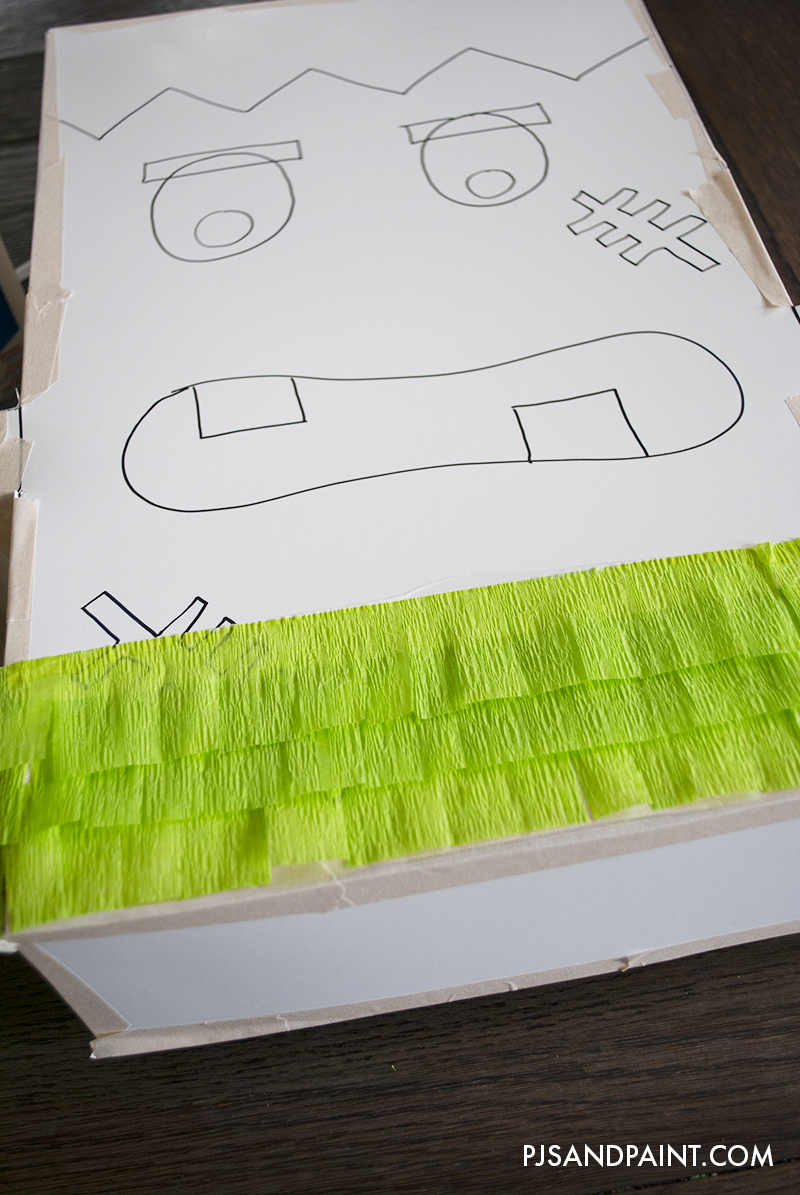
Draw the outline of your piñata character onto the cardboard. In my example, I also drew on Frankenstein's face. However, this isn't necessary. You can just cut out the outline of the shape for now. I just wanted to visualize what the Frankenstein's face would look like within the outline.

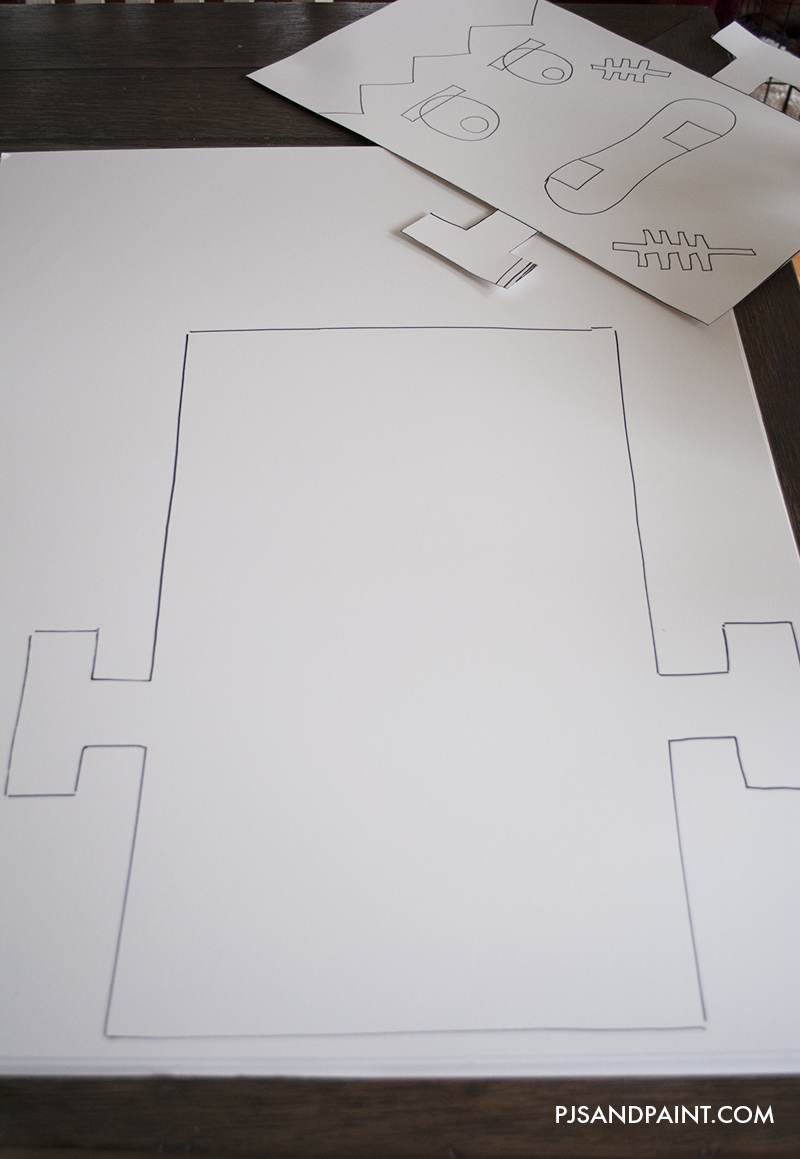
Once you draw your initial shape, cut it out using scissors or an xacto knife. Next, trace the first shape onto another piece of cardboard. I recommend doing it this way instead of drawing another Frankenstein shape to make sure that both the front and back of the piñata are the same size and line up as closely as possibly. When you are done tracing, cut out that outline as well and set aside.

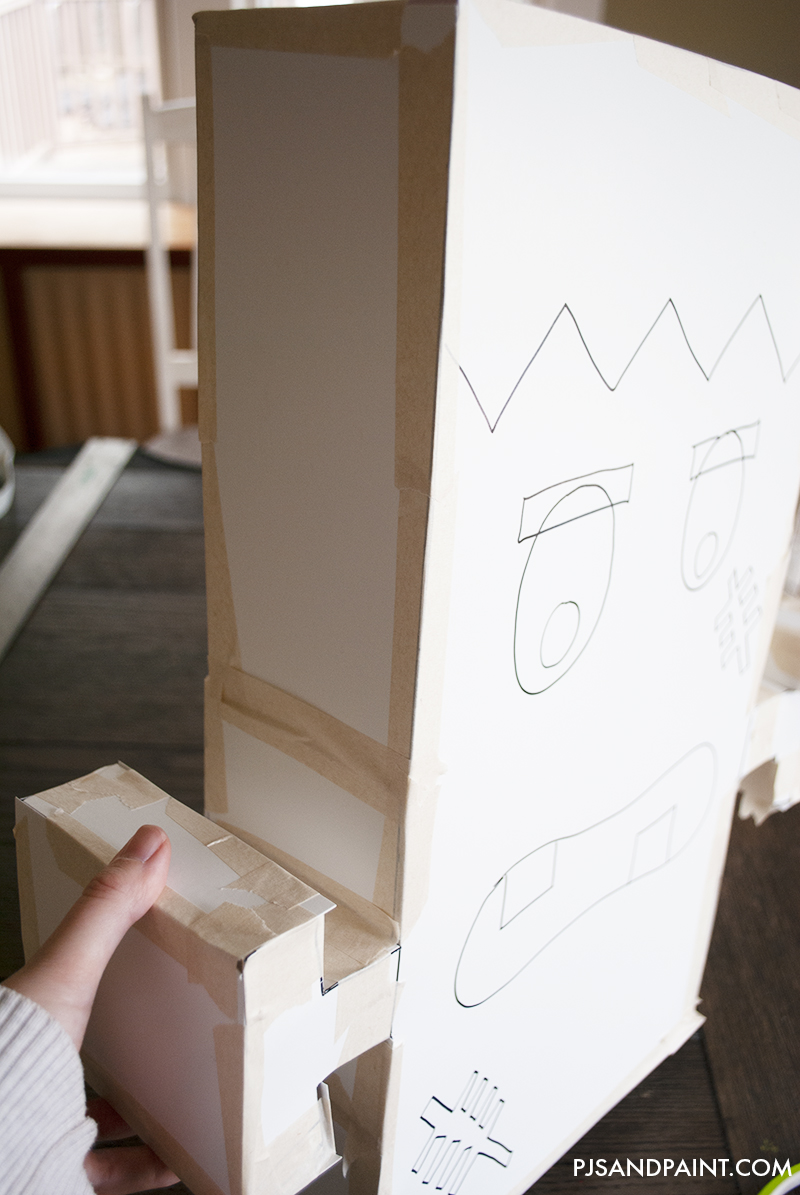
Next, you will need to use a ruler to measure out the side panels of the piñata. For mine, I measured out 4 inch strips of cardboard. Feel free to make your piñata thicker or thinner depending on the size.
Now you can begin taping the 4 inch strips to the front and back of the piñata shape, connecting them. The first few pieces may be a bit tricky but once you get a few on there, it will become sturdier and more easy to work with.
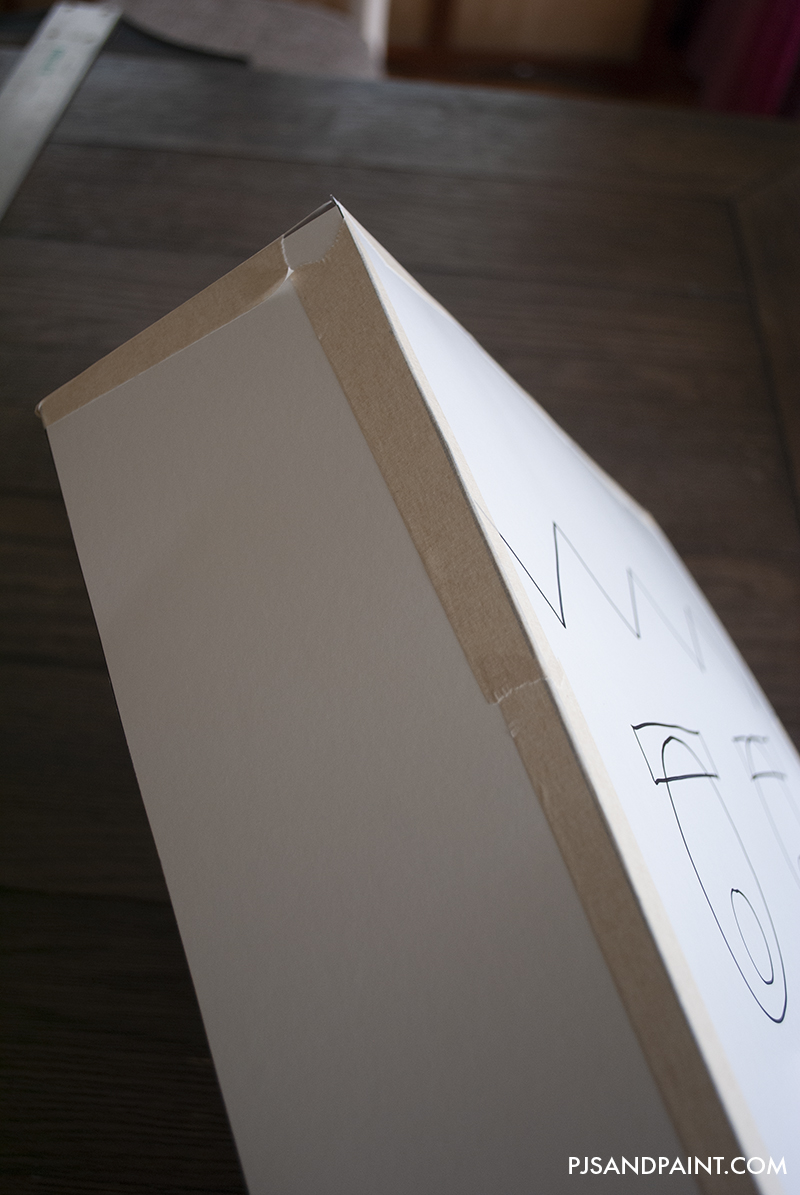
Work around all sides of the piñata to create the 3D shape.
My Frankenstein piñata consisted of all straight edges. However, if your design includes curves, simply bend the cardboard along the edges, taping as you go.
One the base of the piñata is complete, you can cut two slits at the top and then insert a piece of string through and tie together. This is where your piñata will hang from.
Also cut a small panel at the bottom of the piñata where you will add your candy or other treats. If you'd like, you can fill it up now and then tape it shut with masking tape.
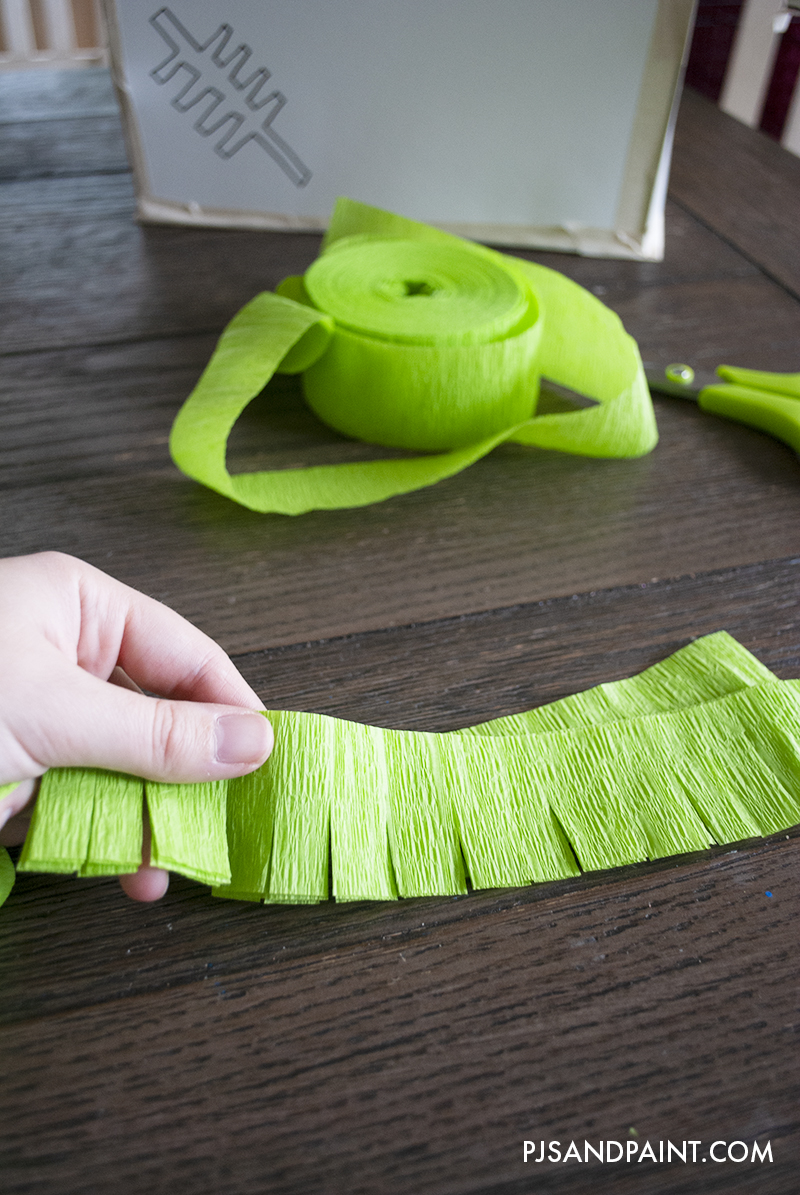
Next you will need to get out your streamers or tissue paper. If using tissue paper, you should first cut it into about 3-4 inch strips. I used streamers and found it to be a lot easier to work with since they were already cut to size.
I measured out how wide my piñata was and cut a bunch of strips to that size. I then stacked a few together and then cut little slits in the streamers about one half to three quarters of the way through, to create a fringe. Repeat for the black streamers as well.
This part is where I had the most fun! Depending on how large you make your piñata, it could be a long process to cover the entire surface area, but I really found this step to be very relaxing.
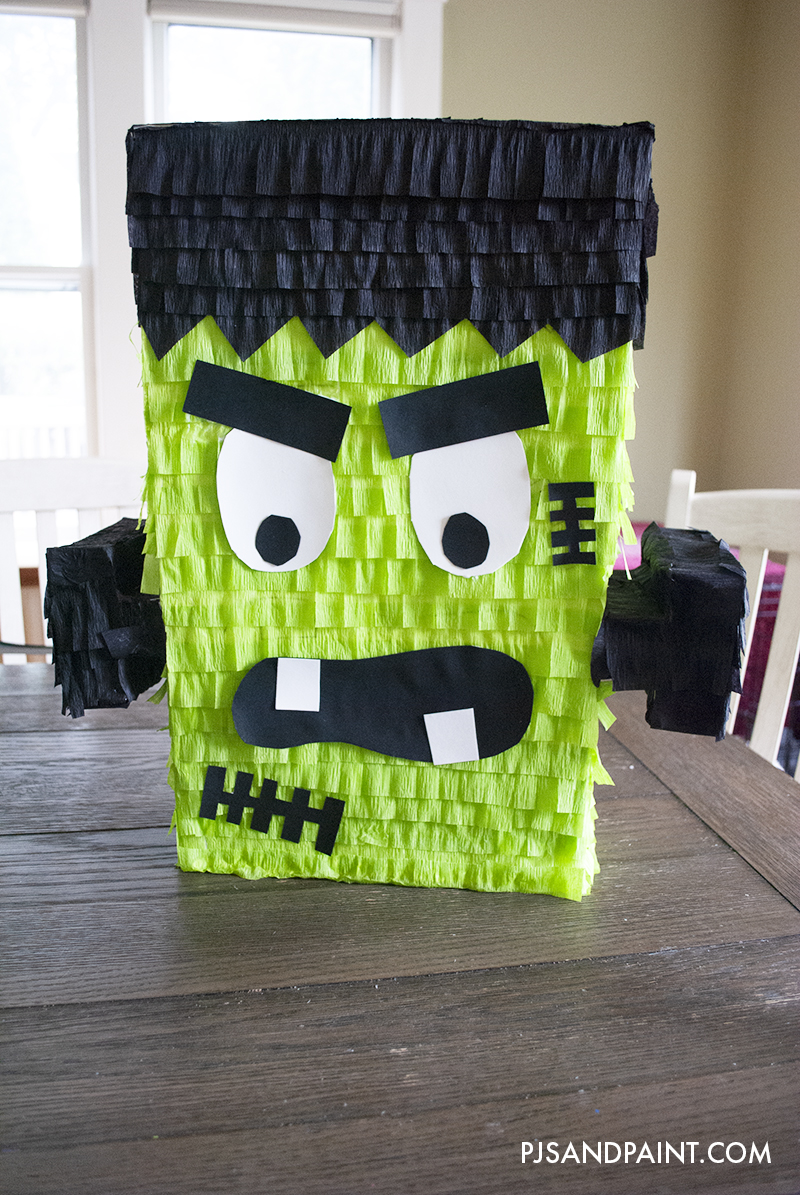
Add a line of glue about 3 inches up from the bottom of your piñata and then attach the first strip of streamer/tissue paper.
Next, add another line of glue maybe a half inch above the first strip and lay the next piece of streamer down. The second strip should cover a bit of the first one to create a layered look.
Continue this process to cover your entire piñata, switching colors when needed.

Once you have the entire piñata covered in streamers, let the glue dry completely. While it is drying, you can begin working on cutting out your construction paper shapes.
For my Frankenstein, I used black and white construction paper to create eyes, eyebrows, a mouth, teeth, and stitches. I attached these to the piñata using regular craft glue. After you're finished, make sure to let everything dry completely before hanging the piñata up.
And that is all there is to it! Again, feel free to be as creative as you wish with your piñata design.
Now you can hang the piñata up, and let your kids start trying to smash the candy and treats out of it!