How to Make a Paper Frankenstein Puppet | Easy Halloween Crafts for Kids
This paper Frankenstein puppet is an adorable Halloween craft that kids will love making! Using only paper, scissors and glue you can create this paper puppet that open and closes it’s mouth!

Disclaimer: This post may contain Amazon affiliate links. This means that at no additional cost to you, I may earn a small commission if you decide to make a purchase. For more information, please feel free to read the affiliate disclosure on our privacy policy page.
I think that some of the best crafts are the ones that you can not only display around the house, but play with as well.
This paper Frankenstein puppet is a fun craft that doubles as a toy that is perfect for encouraging pretend play. Be sure to check out some of our other Halloween puppet crafts listed at the bottom of this post for some more inspiration!
Supplies needed to make one paper Frankenstein puppet:
- Green construction paper
- Black construction paper
- White construction paper
- Pink construction paper
- Scissors
- Glue
- Black marker
You can continue reading to follow the written step by step tutorial, or watch this video for a visual guide:
Step 1: Fold the green paper in half and unfold.
For my example, I used a 9x12 inch piece of green construction paper. Fold the paper in half and then unfold.
Step 2: Fold the edges to the center.
Take the bottom edge of the paper and fold up to meet the center crease that you just created. Then, repeat with the top edge, folding it to the center as well.
Step 3: Fold in half longways.
Take the bottom edge of the paper and then fold up to the top edge.
Step 4: Fold in half again.
Fold the strip of paper in half.
Step 5: Fold the edges.
Start by taking the top flap of the paper and fold to meet the edge. Next, flip the puppet over and repeat by folding the top flap to the edge again. You should now have formed the base of the puppet.
To make sure you folded it correctly, try placing your fingers into the top and bottom flaps. If you move your hand, the mouth should open and close.

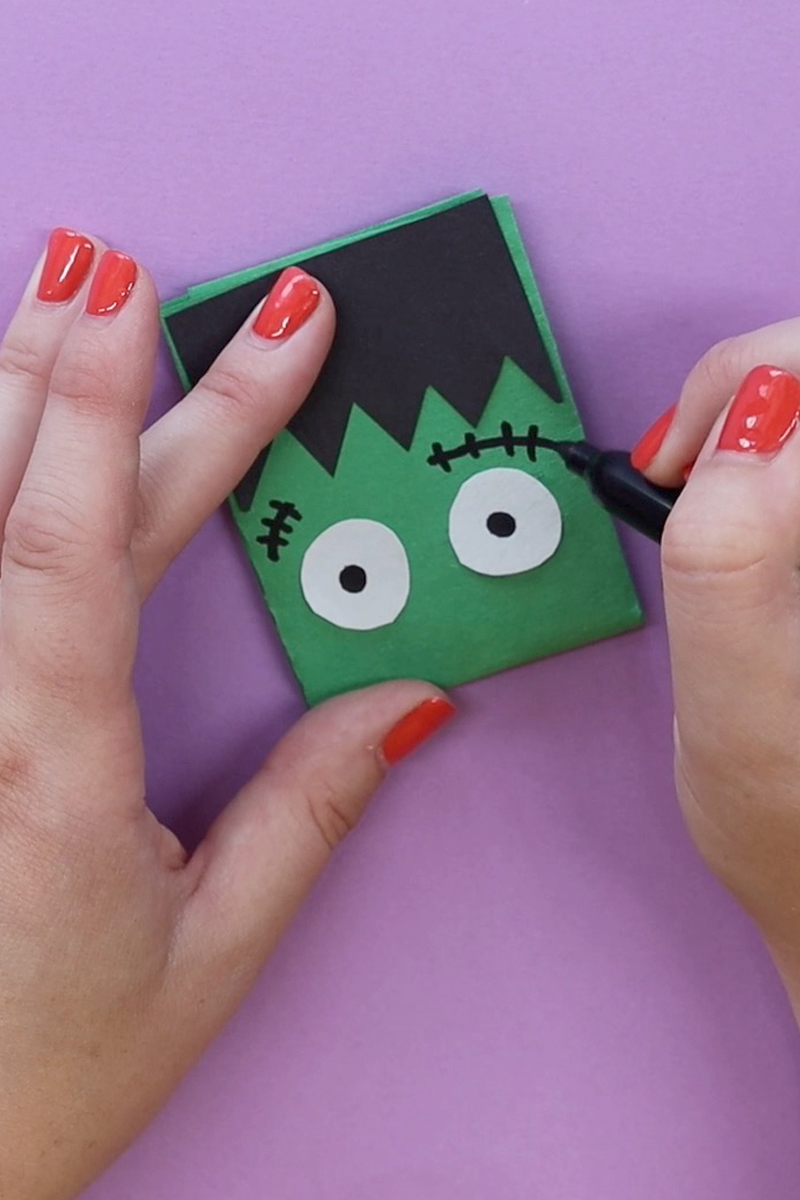
Step 6: Decorate Frankenstein’s face.
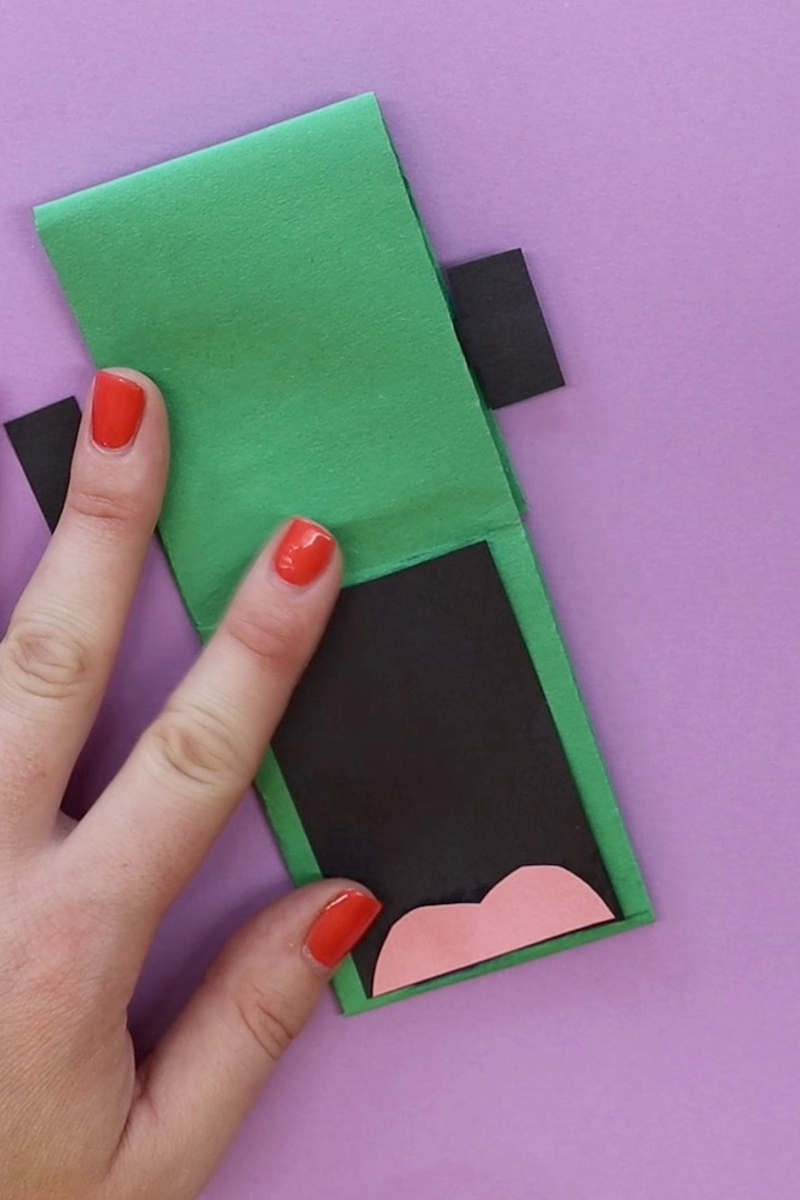
Using black construction paper, cut out Frankenstein’s hair, mouth and bolts for the side of his face. Using white construction paper cut out two circles for the eyes. Finally, using pink construction paper, cut out a shape to form the lounge.
Glue the hair and eyes to the top of the puppet. Glue the bolts to the back of the top flap.
Open up the puppet and glue the mouth and tongue shapes into the inside section.
Take a black marker and draw the eyes, nose and some scars on his face.
Finally, put your hands inside the top and bottom flaps and then have your Frankenstein puppet open and close it’s mouth!